Adding New Products
Learn step-by-step how to add new products to your vendor account.
To learn how to bulk upload products from a csv file click here.
Step: 1 Navigating to your Dashboard and Products page
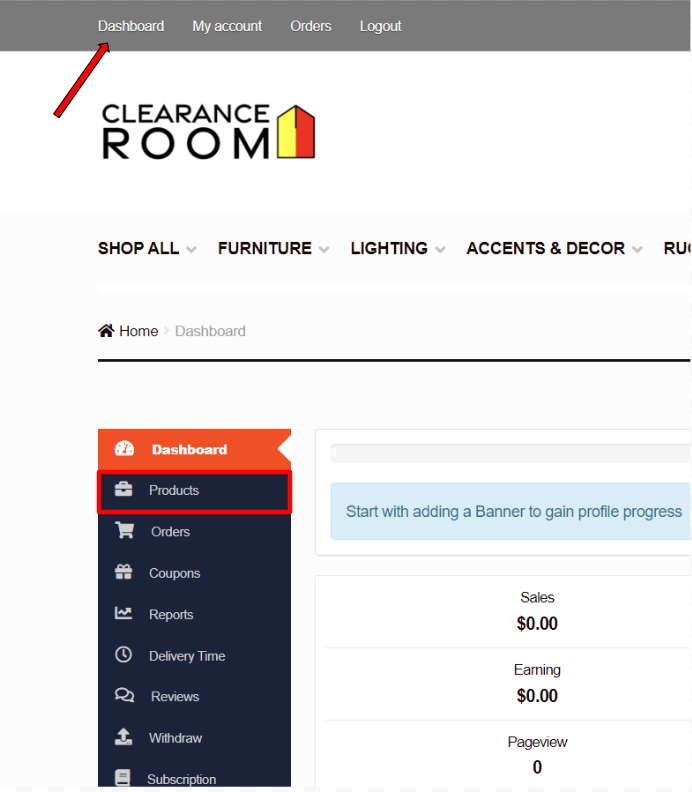
Navigate to your vendor dashboard with the link on the top of the page, then to the products tab from the vendor menu. This is where you can view, edit, and create products.
Step: 2 Navigating the the new product template
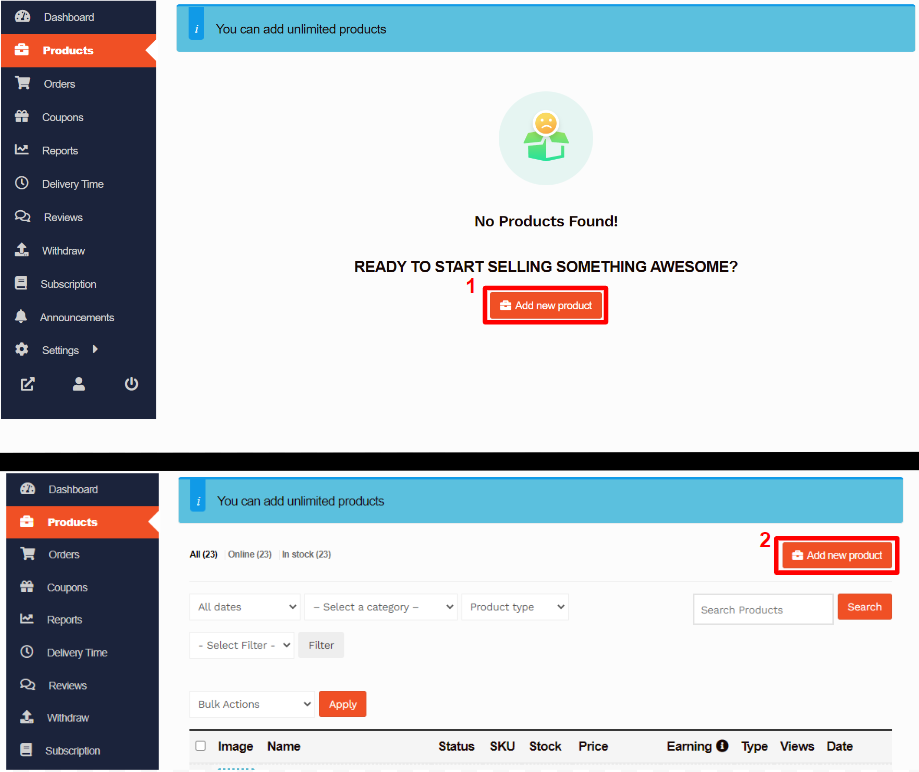
Next select the add products button, this will take you to a new page were you can enter the product information.
This button can be found in location 1 if this is your first time uploading, and in location 2 if there are existing products.
Step: 3 Entering your product information
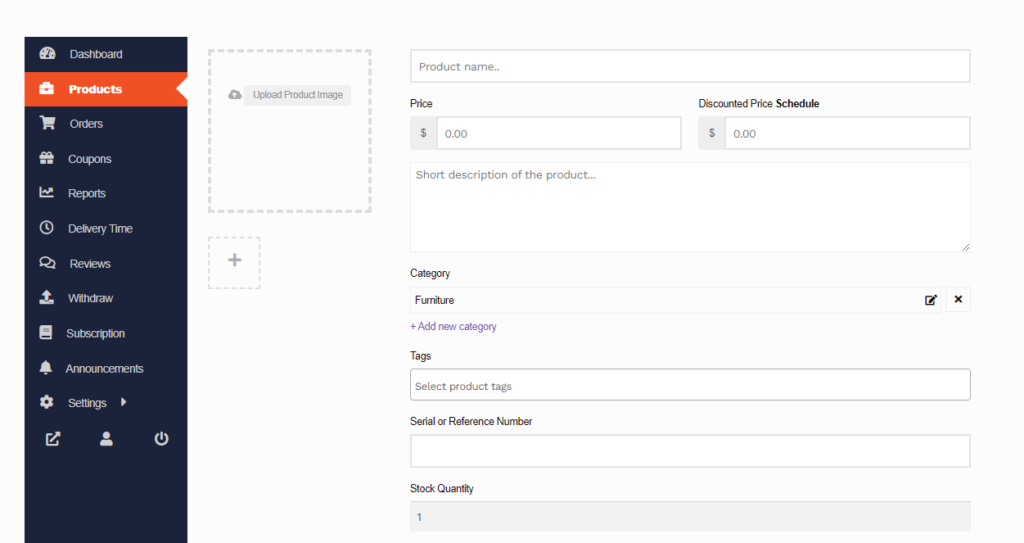
Now that you have found the product template you can enter your product information. The following section outlines what each aspect is and what is required.
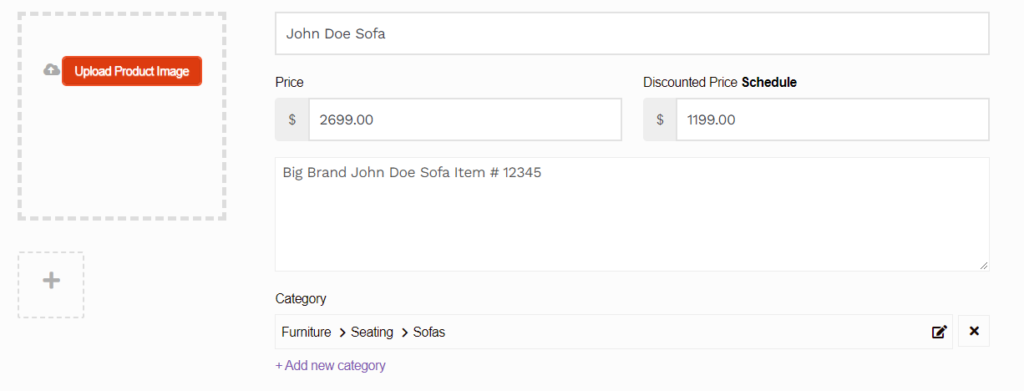
Product Name:
The first box is where you list your products name. In this box enter the basic name for the product.
As an example I will use “John Doe Sofa”.

Product Price:
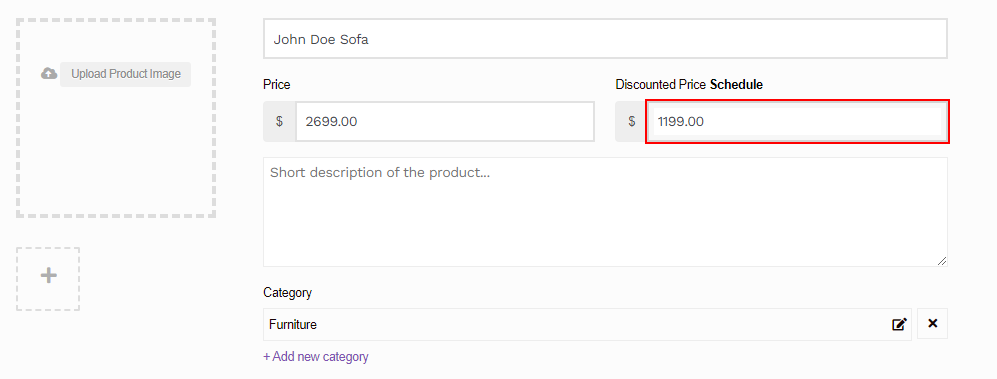
There are two boxes to enter price. The one on the left labeled “Price” is for the products MSRP. The box on the right labeled “Discounted Price” is for the clearance price of the product, what the customer will pay.
In my example, the MSRP is $2699.00 and the clearance price is $1199.00
The schedule button will allow you to set a schedule for the clearance price if you want to let it vary over time.
Product Short Description:
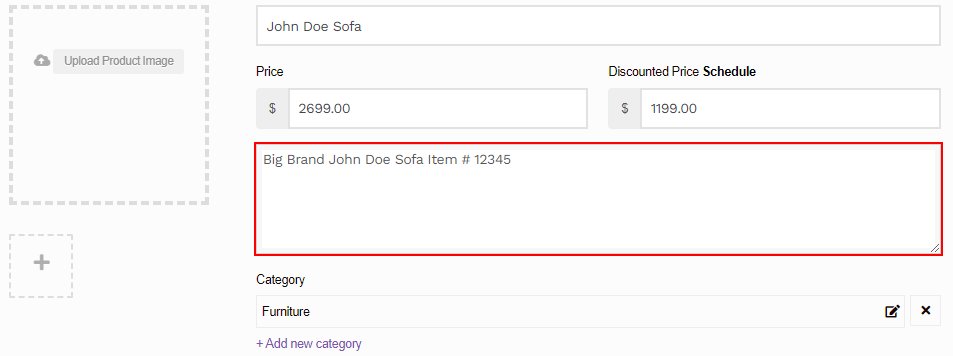
The short description should contain three things, Brand, Name, and Item Number
It should look something like this: “Big Brand John Doe Sofa Item # 12345”
Product Categories:
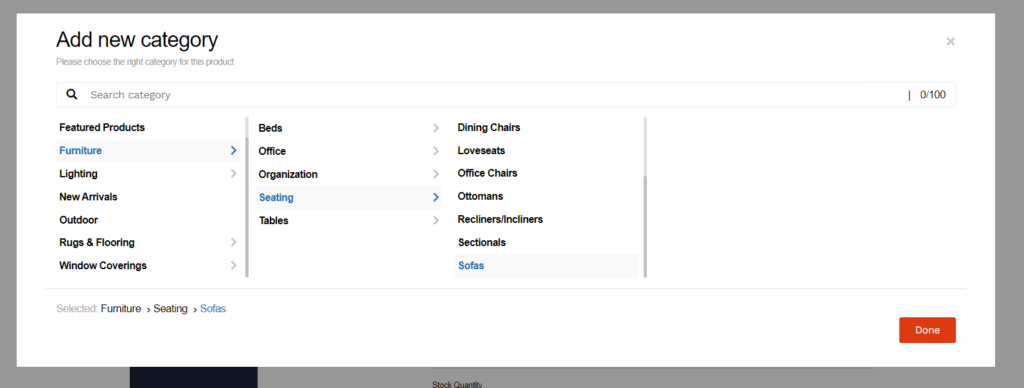
The default category for all products is furniture. This can be changed by clicking on the box, opening a small window to select the category.
For this product I will chose Furniture, with the sub categories seating and sofas
If you think your product fits in multiple categories additional fields can be added with the purple “+Add new category” button
Product tags:
Tags are an optional way to increase your products visibility and SEO. These are short texts that describe aspects of your product. These tags can be added with the integrated search tool.
For this product I will leave it blank.

Product Serial or Reference Number:
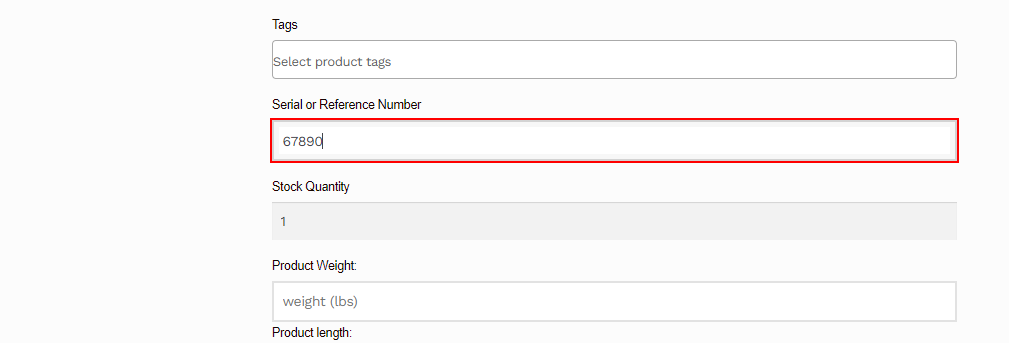
Serial or Reference Number is one of the most important fields. Here you put any number that uniquely identifies this specific product. Not the model or type, but this exact piece sitting in your showroom or storage.
It is this number that our shipping providers will use to ensure the pick up the correct piece.
For this product I will use “67890”
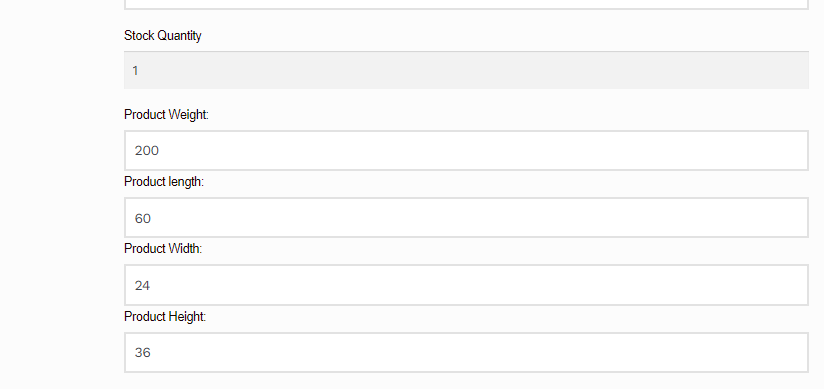
Product Stock Quantity:
Product Stock Quantity is easy, it should always be one

Product Weight and Dimensions:
Product Weight and Dimensions are used to quote and purchase shipping from out providers.
Weight is in pounds (lbs) Dimensions are in inches (in)
These values should be provided by the manufacturer.
This product weighs 200 lbs, is 60 in length, 24 in width, and 36 in height
Product Attributes:
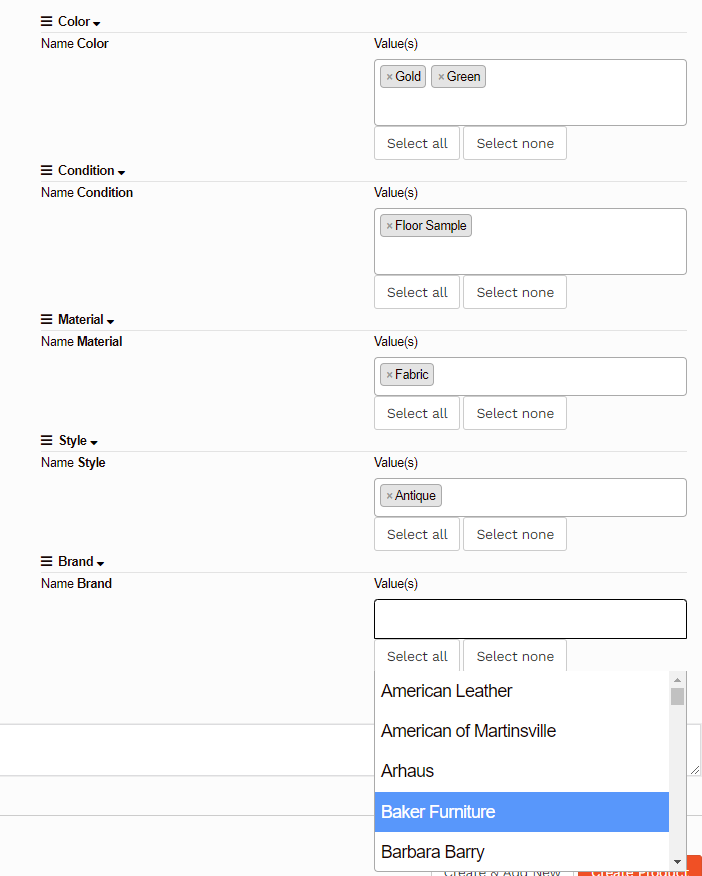
There are 5 basic products attributes: Color, Condition, Material, Style, and Brand (additional attributes can be added in the product edit page).
These attributes are how customers browse and sort products.
These attributes can be added by scrolling through the list or typing in a search. Multiple values can be added to each attribute.
This product is: colored green and gold, its condition is floor sample, its made of fabric, and its style is antique.
Product Description:
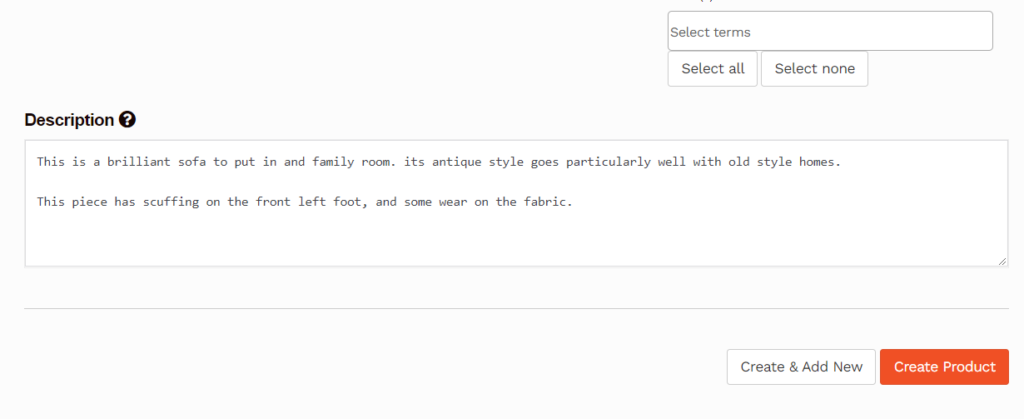
The description is where you disclose any issues or damages on your product may have, as well as any additional information you want to provide.
Be transparent with your disclosures, we do not want to mislead our customers and we can’t do that without you.

Product Photos:
Product Photos are the last aspect to add. There are two types, Product image and Gallery Image
The product image, is the main image for your product. This is what customers will see when browsing products. The product image should be of the whole piece. This image is uploaded with the button in the large square.
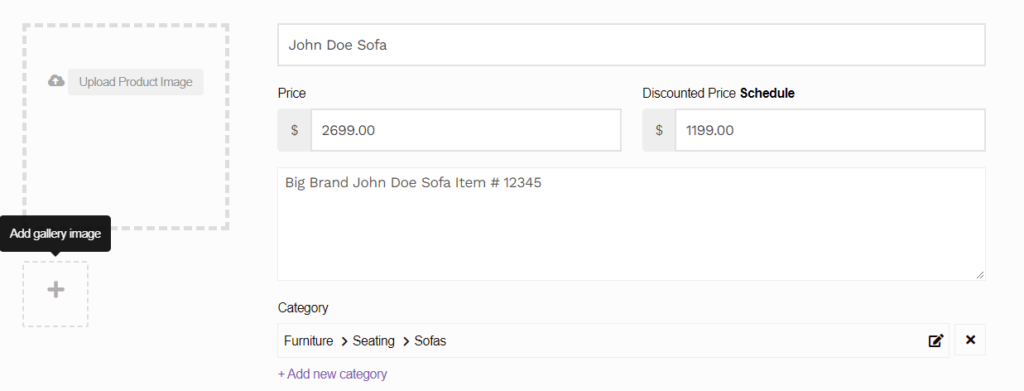
Gallery Images are secondary image that appear on the product page its self. There can and should be multiple gallery images, photos from multiple sides, and of and damages or wear on the product
These photos can be added with the “+” in the small square.
Product Image Guidelines
Product Images should follow a few guidelines.
- Stock photos should not be used unless it is new in box product.
- Any and all damage should be accurately portrayed in the photos
- Images should be at least 1000px by 1000px
- Anything that is not being sold should not be included n the photo (i.e. blankets, pillows, and other accessories).
- Refrain from including your businesses branding or sales tags, we want to keep customers from using your businesses time with customer service requests.
Step: 4 Submitting
After all your information has been entered your ready to submit your product!
At the bottom of the page there are two buttons: Select the orange button to be returned to the main products page, and select the white button to continue and add more products!
